keurig single serve coffee maker instructions
Welcome to your comprehensive guide for using and maintaining a Keurig Single Serve Coffee Maker. This guide offers easy-to-follow instructions to ensure perfect brewing every time‚ along with essential maintenance tips to keep your machine in optimal condition.
Overview of the Keurig Single Serve Coffee Maker
The Keurig Single Serve Coffee Maker is a compact and user-friendly appliance designed to deliver fresh‚ high-quality beverages with minimal effort. It uses K-Cup pods‚ offering a wide variety of coffee‚ tea‚ and hot chocolate options. The machine is known for its sleek design‚ easy operation‚ and space-saving features‚ making it ideal for home‚ office‚ or small spaces. With customizable brew sizes and strength options‚ it caters to diverse preferences. Regular maintenance‚ such as descaling and cleaning‚ ensures optimal performance and longevity. The Keurig’s innovative technology allows for quick brewing‚ while its intuitive interface makes it accessible to all users. It’s a perfect solution for coffee lovers seeking convenience and consistency;
Importance of Proper Usage and Maintenance
Proper usage and maintenance are crucial for extending the life of your Keurig Single Serve Coffee Maker and ensuring consistent performance. Regular descaling removes mineral buildup‚ preventing clogs and maintaining water quality. Cleaning the needles and reservoir prevents bacterial growth and residue accumulation‚ which can affect taste. Following the manufacturer’s guidelines for brewing and maintenance ensures optimal functioning. Neglecting these steps can lead to reduced efficiency‚ poorer taste‚ and potential machine damage. By prioritizing maintenance‚ you preserve the machine’s efficiency and enjoy a perfect cup every time. Consistent care also prevents costly repairs and keeps your Keurig running smoothly for years.

Understanding Your Keurig Single Serve Coffee Maker
Understanding your Keurig involves familiarizing yourself with its components and functionality. The machine uses K-Cups‚ a water reservoir‚ and a brew head to deliver a perfect cup. Simple controls allow customization of brew size and strength‚ while compatible pods offer versatility. Regular maintenance ensures longevity and optimal performance‚ making it essential to grasp how each part contributes to the brewing process.
Main Components of the Keurig Coffee Maker
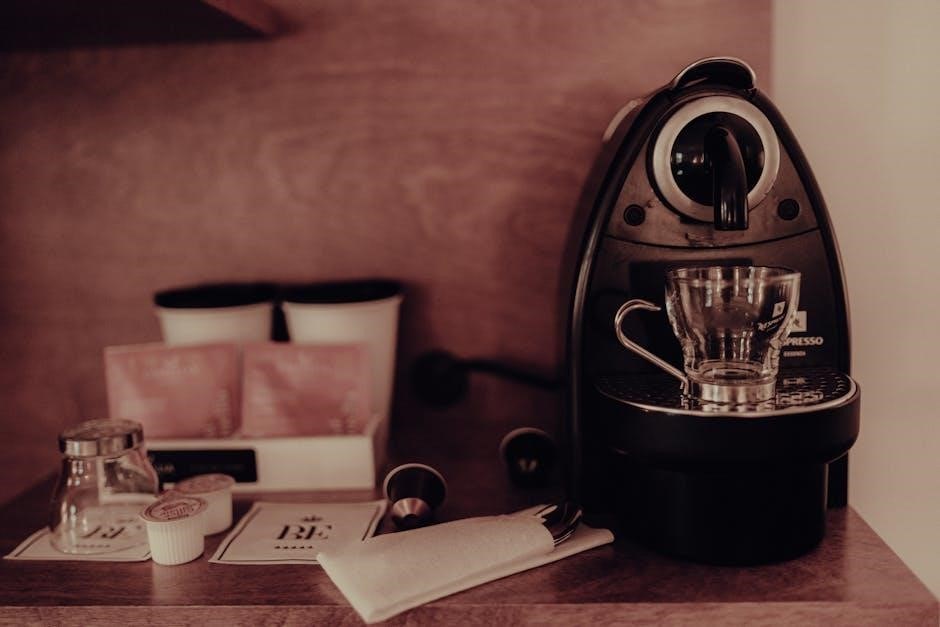
The Keurig Single Serve Coffee Maker consists of several key components designed for efficient brewing. The water reservoir holds fresh water‚ which is heated during the brewing process. The brew head features entry and exit needles that puncture the K-Cup to facilitate water flow. The control panel allows users to adjust settings like brew size and strength. The K-Cup holder secures the coffee pod in place‚ while the drip tray catches excess liquid. These parts work together seamlessly to deliver a perfect cup of coffee with minimal effort‚ making the Keurig a convenient and user-friendly appliance for coffee lovers.
Types of K-Cups and Compatible Pods
K-Cups are the signature pods designed for Keurig coffee makers‚ offering a wide variety of coffee‚ tea‚ and hot chocolate options. They are sealed for freshness and come in over 600 flavors from 60+ brands. Compatible pods‚ including My K-Cup for ground coffee‚ allow users to brew their favorite beans. Third-party pods expand flavor options further‚ while eco-friendly alternatives like biodegradable or recyclable cups cater to sustainability preferences. These pods ensure convenience and versatility‚ making it easy to explore diverse beverages while maintaining compatibility with your Keurig machine.

Setting Up Your Keurig Single Serve Coffee Maker
Setting up your Keurig involves unboxing‚ placing it on a flat surface‚ plugging it in‚ and priming the machine with fresh water for optimal performance and first use preparation.
Step 1: Unboxing and Placement
Begin by carefully unboxing your Keurig Single Serve Coffee Maker‚ ensuring all components‚ such as the machine‚ water reservoir‚ and K-cup holder‚ are included and undamaged. Place the machine on a flat‚ stable surface‚ ideally near a power outlet to avoid cord strain. Ensure the area is level and allows proper drainage if applicable. Leave sufficient space around the machine for airflow and easy access. Before plugging in‚ read the manual to familiarize yourself with the parts and settings. This initial setup ensures your Keurig is ready for its first use and performs optimally.
Step 2: Plugging In and Initial Setup
Plug your Keurig into a nearby electrical outlet‚ ensuring the cord is securely connected to both the machine and the wall. Once powered on‚ the Keurig will enter its initial setup mode. Use the control panel to set your preferred language‚ time‚ and unit of measurement. If your model has a built-in water filter‚ install it according to the manufacturer’s instructions. Allow the machine to complete any automatic priming or initialization processes. This step ensures your Keurig is ready for its first use and is customized to your preferences. Proper setup guarantees optimal performance and a seamless brewing experience.
Step 3: Priming the Machine
After plugging in and setting up your Keurig‚ it’s essential to prime the machine to ensure proper water flow and remove any air from the internal lines. Fill the water reservoir with fresh‚ filtered water. Place a mug under the spout and select the largest brew size available on your model. Run a brew cycle without inserting a K-cup. This process will force water through the system‚ preparing it for use. Repeat the process if necessary to ensure all air is removed. Priming ensures your machine is ready for its first use and prevents any issues during brewing. This step is crucial for optimal performance and longevity of your Keurig.

Using Your Keurig Single Serve Coffee Maker
Using your Keurig is straightforward: fill the water reservoir‚ select your K-cup‚ choose brew size‚ and brew. Enjoy a perfect cup every time with ease.
Filling the Water Reservoir
Filling the water reservoir is the first step in preparing your Keurig for use. Locate the reservoir‚ typically on the side or back of the machine. Open the lid and pour fresh‚ filtered water to the recommended level. Avoid using tap water if it has high mineral content‚ as it can cause scaling. For optimal taste‚ use bottled or filtered water. Ensure the reservoir is not overfilled‚ as this could lead to spills or machine malfunction. Regularly cleaning the reservoir with a mild detergent can prevent bacteria growth. Always check the water level before brewing to ensure uninterrupted operation. This simple step ensures your coffee tastes its best every time.
Selecting and Inserting the K-Cup
Selecting the right K-Cup is essential for a personalized brewing experience. With over 600 varieties‚ choose from coffee‚ tea‚ or hot chocolate to suit your taste. Once selected‚ lift the machine’s handle to open the brew head. Gently insert the K-Cup into the pod holder‚ ensuring it is seated correctly. Close the handle firmly to secure the pod. The machine will puncture the K-Cup‚ preparing it for brewing. Always use a fresh pod for each brew to ensure optimal flavor. After brewing‚ remove and dispose of the used K-Cup. For eco-friendly practices‚ consider recycling the pod or reusing the grounds for compost. Proper insertion ensures a seamless brewing process and prevents any machine issues.
Choosing Your Brew Size and Options
To customize your brewing experience with a Keurig Single Serve Coffee Maker‚ begin by selecting your preferred brew size. Most models offer options ranging from 6 to 12 ounces. Use the control panel buttons labeled with these sizes to choose the desired amount of coffee. Additionally‚ some advanced models feature a “Strong Brew” option for a bolder flavor and an “Iced” setting for brewing over ice. The “Hot Water” button allows you to dispense hot water without a K-Cup‚ ideal for tea or instant soups. Experiment with these settings to achieve your perfect cup. Remember‚ smaller sizes may result in stronger coffee‚ while larger sizes may be weaker. Consult your user manual for specific features available on your Keurig model to enhance your brewing experience.
Brewing Your Coffee
Once your K-Cup is inserted and your brew size is selected‚ close the lid firmly to ensure proper alignment of the needles. Press the “Brew” button to start the process. The machine will puncture the K-Cup‚ forcing hot water through the coffee grounds into your cup. Depending on the model‚ brewing typically takes 1-2 minutes. For optimal flavor‚ use filtered water and ensure the machine is at the correct temperature. After brewing‚ remove your cup and discard the used K-Cup. Regularly running a water-only brew cycle helps maintain cleanliness. Experiment with different brew sizes and strengths to tailor your coffee experience. Proper brewing techniques ensure consistent flavor and longevity of your Keurig.

Customizing Your Coffee Experience
Adjust brew strength and flavor to suit your taste. Use K-Cups for convenience or reusable filters for ground coffee. Experiment with different sizes and settings for personalized brewing options.
Adjusting Brew Strength and Flavor
Customize your coffee experience by adjusting brew strength and flavor to suit your preferences. Many Keurig models offer a strength control option‚ allowing you to choose between regular or bold brewing. For stronger coffee‚ select the “Strong” setting‚ which slows the brewing process to extract more flavor. You can also experiment with different K-Cup varieties‚ as some pods are designed for bolder or smoother profiles. Using a My K-Cup reusable filter with ground coffee gives you even more control‚ letting you adjust the amount of coffee for a lighter or stronger brew. Additionally‚ try different grind sizes or coffee origins to refine your flavor experience. Experimenting with these options ensures every cup is tailored to your taste preferences.
Exploring Different Coffee and Beverage Options
Your Keurig Single Serve Coffee Maker offers a wide variety of coffee and beverage options to satisfy any taste. With thousands of K-Cup pods available‚ you can explore flavors from renowned brands like Dunkin’‚ Starbucks‚ and Peet’s Coffee. Beyond coffee‚ enjoy tea‚ hot cocoa‚ and even specialty drinks like cappuccinos and lattes. For a personalized touch‚ use the My K-Cup reusable filter to brew your favorite ground coffee‚ allowing you to adjust the amount for a stronger or weaker cup. Experiment with different roast levels‚ from light and bright to dark and bold‚ to find your perfect match. You can also discover flavored coffees‚ decaf options‚ and seasonal varieties for added fun and variety in your daily routine.
Using Reusable K-Cups for Ground Coffee
Reusable K-Cups offer a cost-effective and eco-friendly way to brew your favorite ground coffee using your Keurig. Simply fill the reusable pod with your preferred coffee grounds‚ ensuring a medium to medium-coarse grind for optimal flavor. Insert the filled K-Cup into the machine‚ select your desired brew size‚ and start brewing. This method allows you to customize your coffee strength and flavor while reducing waste. For the best results‚ use fresh‚ high-quality coffee and clean the reusable K-Cup regularly. This feature is perfect for coffee lovers who enjoy experimenting with different beans or blends without the need for disposable pods. It’s a great way to personalize your coffee experience while saving money and the environment.
Maintenance and Troubleshooting
Regular maintenance ensures optimal performance. Descale every 3-6 months to prevent mineral buildup. Clean needles and internal parts to maintain functionality and prevent clogs. Use filtered water for better taste and longevity.
Descaling Your Keurig Coffee Maker
Descaling is crucial to remove mineral deposits that can clog your Keurig and affect performance. Mix 50% white vinegar and water in the reservoir. Turn off the machine and let it sit for 30 minutes. Run a brew cycle without a K-Cup to flush the solution through the system. Repeat the process 2-3 times to ensure all vinegar is removed. For tougher buildup‚ use a Keurig-approved descaling solution. After descaling‚ run several rinsing cycles with fresh water to eliminate any vinegar taste. This maintenance step prevents limescale buildup‚ ensures optimal water flow‚ and keeps your coffee tasting its best. Regular descaling extends the lifespan of your machine and maintains its efficiency.
Cleaning the Needles and Internal Parts
Cleaning the needles and internal parts of your Keurig is essential to prevent clogs and ensure proper function. Use a pipe cleaner dipped in white vinegar to gently clean the entry and exit needles‚ removing any blockages. Soak the pipe cleaner in vinegar‚ then twist it around the needles to clear debris. Use a cotton swab to wipe down the area around the needles. Remove and wash the pod holder with hot soapy water‚ rinsing thoroughly before replacing it. Regularly cleaning these parts prevents buildup and keeps your machine functioning smoothly. This simple maintenance step ensures consistent performance and prevents issues like weak flow or clogged lines.
Running Rinsing Cycles
Running rinsing cycles is a simple yet crucial step to keep your Keurig functioning smoothly. Fill the water reservoir with fresh water and run multiple brew cycles without inserting a K-Cup. This process flushes out any residual coffee oils‚ bacteria‚ or debris from the internal components. Repeat the cycle 2-3 times for thorough cleaning. For optimal maintenance‚ perform this rinse weekly‚ especially after descaling or if you notice a bitter taste in your coffee. After descaling‚ run several additional rinsing cycles to remove any vinegar residue. Regular rinsing ensures your machine remains clean‚ prevents mineral buildup‚ and maintains the quality of your brewed coffee. Consistency is key to preserving your Keurig’s performance and longevity.
Troubleshooting Common Issues
If your Keurig isn’t functioning properly‚ start by checking the power cord and ensuring it’s plugged in. If the machine doesn’t turn on‚ reset it by unplugging and replugging it. For slow water flow‚ descale the machine to remove mineral buildup. If coffee isn’t hot enough‚ run a hot water cycle without a K-Cup to reset the temperature. Clogged needles can be cleaned with a paper clip or pipe cleaner. If the machine displays an error‚ refer to the user manual for specific solutions. Regular maintenance‚ like rinsing cycles and descaling‚ helps prevent many issues. Addressing problems promptly ensures your Keurig continues to brew perfectly every time.

Additional Tips for Optimal Performance
Use filtered water to enhance taste and reduce mineral buildup. Clean the machine regularly to prevent mold and bacteria growth. Store K-Cups in a cool‚ dry place to preserve freshness and flavor. Experiment with reusable K-Cups for ground coffee to customize your brew. Run rinsing cycles weekly to maintain hygiene and performance. Descale every 3-6 months to prevent mineral deposits. These simple practices ensure your Keurig delivers consistent‚ delicious results and lasts longer.
Using Filtered Water for Better Taste
Using filtered water in your Keurig significantly enhances the taste of your coffee. Mineral-rich water can leave deposits and alter flavor‚ so opting for bottled or filtered water is recommended. Double-filtering‚ even if your Keurig has a built-in filter‚ helps reduce mineral buildup and prolongs machine life. This simple step ensures cleaner‚ fresher-tasting coffee. Regularly descaling with a vinegar solution also maintains optimal performance. By prioritizing water quality‚ you preserve your machine and enjoy consistently delicious brews. This preventative maintenance is key to keeping your Keurig in top condition and your coffee tasting its best. Filtered water is a small change that makes a big difference in both taste and machine longevity.
Regularly Cleaning the Machine
Regular cleaning is essential to maintain your Keurig’s performance and ensure great-tasting coffee. Start by running weekly rinsing cycles with fresh water to remove grime and bacteria. For deeper cleaning‚ mix equal parts water and white vinegar in the reservoir and run brew cycles. Repeat this process 2-3 times to descale and remove mineral buildup. Use pipe cleaners dipped in vinegar to clean the entry and exit needles‚ ensuring proper flow. Wipe the pod holder and surrounding areas with a cotton swab and wash it with soapy water. Regular cleaning prevents limescale buildup‚ keeps your machine efficient‚ and ensures every cup tastes its best. Consistent maintenance is key to prolonging the life of your Keurig and enjoying optimal brewing results.
Storing K-Cups Properly
Proper storage of K-Cups is crucial to preserve their flavor and aroma. Store them in a cool‚ dry place away from direct sunlight and heat sources. Use an airtight container to protect the pods from moisture and air exposure‚ which can cause the coffee to become stale. Avoid storing K-Cups in humid environments or near strong-smelling foods‚ as odors can transfer to the coffee. For optimal freshness‚ keep the container away from ovens‚ microwaves‚ and other heat-generating appliances. Proper storage ensures your K-Cups remain fresh and flavorful‚ allowing you to enjoy a perfect cup of coffee every time you brew. This simple step also helps extend the shelf life of your pods.
With proper care and use‚ your Keurig Single Serve Coffee Maker will consistently deliver delicious coffee. Regular maintenance ensures longevity‚ and experimenting with settings and pods enhances your experience.
Final Thoughts on Using Your Keurig
Your Keurig Single Serve Coffee Maker offers convenience and customization‚ making it a great addition to your daily routine. By following the instructions and maintenance tips‚ you can ensure optimal performance and enjoy a variety of beverages. Experiment with different K-Cup flavors and settings to tailor your experience. Regular descaling and cleaning will keep your machine running smoothly‚ while using filtered water enhances taste. With proper care‚ your Keurig will continue to deliver fresh‚ delicious coffee and other beverages for years to come. Happy brewing!
Encouragement for Experimentation and Maintenance
Embrace the versatility of your Keurig by experimenting with various K-Cup flavors and settings to find your perfect cup. Don’t hesitate to try new coffee blends‚ teas‚ or even hot chocolate. Regular maintenance‚ such as descaling and cleaning‚ is crucial for preserving your machine’s performance and longevity. By committing to these simple routines‚ you’ll ensure that every brew is as satisfying as the first. Take pride in your Keurig and explore its full potential to elevate your daily coffee experience. With consistent care and curiosity‚ your Keurig will remain a reliable companion for all your beverage needs.